How To Apply
How to Apply Grout Renue ‘N’SealTM
Preparation
It is very easy to apply but as with most jobs, paying careful attention to the preparation will save you time in the long run and allow the best possible results.
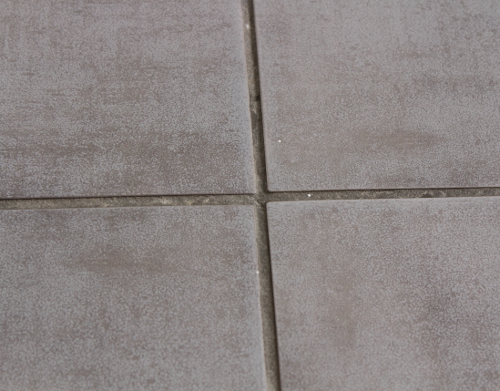
- Joints to be prepared
It is critical that the surface of the grout to be coloured, is clean and dry. It is not too important if there remain deep stains, after all, if the grout was spotless, or easily cleanable there might not be the need to colour it in the first place. What does matter is that there is nothing on the surface that will act as a bond breaker or otherwise interfere with the product’s ability to bond to the grout.
For existing cement-based and polymer-modified grouts, we would suggest a thorough clean with an alkaline cleaner such as Xtreme Clean by All for Stone. Sometimes grout may need etching for a better mechanical key. For example, very old grout may be deeply engrained with dirt, using a mild phosphoric acid-based cleaner, properly diluted, will remove a fine layer of the surface cement from the grout ensuring there is nothing left on the surface to act as a bond breaker. In addition it will also etch the surface, making it slightly rougher which provides a better surface to receive the colorant. Also, some new grout joints can be so heavily polymer-modified that they present a very smooth surface which resists water, temporarily). Such a surface can prevent the Grout Renue ‘N’ Seal from getting an adequate grip. The same type of cleaner, such as Cement Haze Plus by All for stone, will get over this problem, by again etching a key onto the surface being prepared.
Application & Clean Up
Suggested Tools: Grout Colorant Application Brush or small toothbrush, good quality sponges, sponge cloths, paper towels, rubber gloves (surgical-disposable types are best), Scrubber sponge or emulsifying pad, water bottle with mist/spray nozzle.
Method #1 – “Apply & Go”
Wherever possible try to use this method as it is by far the simplest and fastest.
- Once the grout joint has been adequately prepared, it should be allowed to DRY OUT THOROUGHLY. Attempting to apply Grout Renue ‘N’ Seal –TM to a damp or moist grout joint may result poor bonding, leading to the product peeling.
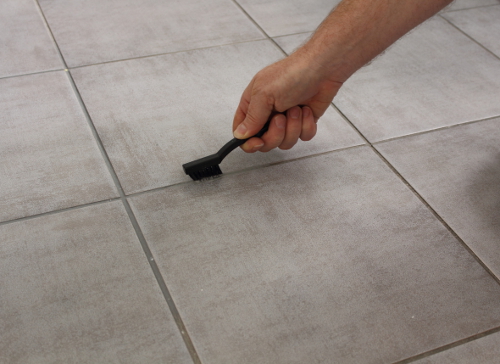
- Pour a little of the product into a shallow dish or container. Using a suitable brush (we tend to use applicator brushes that are medium-stiff – if you cannot find one, an old-fashioned toothbrush is perfect

Applying Grout Renue ‘N’ Seal
- Dip the brush into the product and gently apply directly to the joint, using a back and forth motion, keeping the amount that gets onto the tile edge to a minimum.
- Alternatively, use a good quality, hydrophilic ‘Tiler’s’ sponge – in other words a dense foam sponge, that is cut into clean 50 to 75 mm cubes using a new sharp craft knife blade – this will give you a handful of sponge blocks with crisp, clean edges. Take a sponge block and dip one of the edges into the product and use this to ‘strike’ or drag the colorant onto the grout joint. We often find this method to be faster.
- Make sure that the product is not applied too generously; the aim is to coat the grout surface, rather than flood it. If the granular texture of the grout is obvious, then it should still be clearly visible through the freshly applied colorant. If the grout is quite smooth to begin with then it is a little harder, just try to coat the grout with as thin a layer as possible. DO NOT attempt to thicken up the coating to cover a darker colour that is still showing through the wet product; wait for it to dry (as it can often look different then) and if necessary apply a second coat onto a previously dried one – this is a far more effective way to cover strong colours, Using this two-coat method we can make drastic colour changes such as black to white if needed.
- Allow a couple of minutes for the coating to begin to penetrate the grout joint, then use a sponge cloth or pad ideally to clean off the excess. Dampen the cloth/pad first with water to soften it, but wring it out so that it is just damp and not dripping with water. Keeping the fingers flat, wipe away the excess with firm, but gentle pressure. Try not to allow the sponge/fingers to press into the grout joint so that the colorant is wiped off the joint. Keep rinsing and wronging out the sponge cloth regularly.
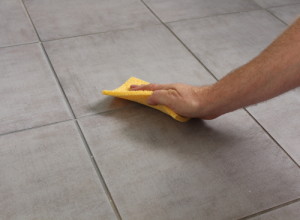
Wiping with sponge cloth
- Should you inadvertently remove a small amount of the colorant from the joint with the sponge, don’t panic; wait until you have completed the clean-up then go back to that spot and with a small paint brush, just top up the spot locally.
- Job finished – just allow it a couple of hours to thoroughly dry before walking on or using the surface. Full cure is achieved in approximately 24 hours.
- We strongly recommend the use of disposable rubber gloves to keep hands clean and free from the colorant as it can dry quite quickly on the skin.

Finished Job
Method #2 – “Apply, Wait & Clean Off”
Occasionally, Method #1 will not be practical or possible: for example sometimes the grout joint is a little over flush, or perhaps the grout itself is very smooth and attempting to clean up the surplus right away can lead to removing it all from the joint at the same time. In such cases it can be better to leave the product to begin to form a bond on the grout. This will mean that it also dries on the tile surfaces but it should not BOND to them.
This method requires a little more effort in the clean-up but it also allows for a more aggressive cleaning method.
Essentially follow exactly the same method of application as above, from points 1 up to and including point 4 as follows:
- Once the grout joint has been adequately prepared, it should be allowed to DRY OUT THOROUGHLY. Attempting to apply Grout Renue ‘N’ Seal –TM to a damp or moist grout joint may result poor bonding, leading to the product peeling.
- Pour a little of the product into a shallow dish or container. Using a suitable brush (we tend to use applicator brushes that are medium-stiff – if you cannot find one, an old-fashioned toothbrush is perfect
- Dip the brush into the product and gently apply directly to the joint, using a back and forth motion, keeping the amount that gets onto the tile edge to a minimum.
- Alternatively, use a good quality, hydrophilic ‘Tiler’s’ sponge – in other words a dense foam sponge, that is cut into clean 50 to 75 mm cubes using a new sharp craft knife blade – this will gie you a handful of sponge blocks with crisp, clean edges. Take a sponge block and dip one of the edges into the product and use this to ‘strike’ or drag the colorant onto the grout joint. we often find this method to be faster.
- Make sure that the product is not applied too generously; the aim is to coat the grout surface, rather than flood it. If the granular texture of the grout is obvious, then it should still be clearly visible through the freshly applied colorant. If the grout is quite smooth to begin with then it is a little harder, just try to coat the grout with as thin a layer as possible. DO NOT attempt to thicken up the coating to cover a darker colour that is still showing through the wet product; wait for it to dry (as it can often look different then) and if necessary apply a second coat onto a previously dried one – this is a far more effective way to cover strong colours, Using this two-coat method we can make drastic colour changes such as black to white if needed.
- Allow a longer time for the product to bond to the grout joint. depending on ambient conditions this can be 30 minutes to an hour, but no longer than 12 hours
- Using a clean, household spray bottle containing clean water; set the nozzle to ‘mist’ and lightly spray a small section (say 60 cm x 60 cm ) with water (do not flood) leave the water for a couple of minutes. Then, using an emulsifying pad, or scrubber sponge (with WHITE nylon scourer surface), gently begin to scour the excess, use a circular motion, and avoid pressing directly into the joints. Use a dampened sponge and remove the now re-emulsified colorant. Keep doing this until all the excess is removed. As you progress you will be able to press more directly along the tile edges to remove any remaining stubborn residues and fine-detail the finish.
- Should you inadvertently remove a small amount of the colorant from the joint with the sponge, don’t panic; wait until you have completed the clean-up then go back to that spot and with a small paint brush, just top up the spot locally.
- Polish or buff the tiles dry with clean white paper towels or old cotton terry-towels and the job is finished – just allow it a couple of hours to thoroughly dry before walking on or using the surface. Full cure is achieved in approximately 24 hours.
- We strongly recommend the use of disposable rubber gloves to keep hands clean and free from the colorant as it can dry quite quickly on the skin.
Maintenance
When fully cured, Grout Renue ‘N’ SealTM is resistant to most house-hold cleaners but for regular maintenance wiping with a soft, damp cloth is all that will be required. For floors, normal mopping is fine. Harsh cleaning methods and products should be avoided. Try also to avoid scrubbing directly onto the grout joints.